Apple Propagation: Grow Your Own Orchard!
Unlocking the secrets of fruit cultivation, enthusiasts can transform their gardens into thriving orchards through apple propagation, an art deeply rooted in horticultural science. The USDA, with its extensive resources, offers valuable insights into best practices for successful grafting techniques, a critical aspect of apple propagation. Budding, another method of apple propagation, finds a proponent in experts like Lee Reich, whose guidance simplifies this intricate process for home gardeners. The process requires tools and materials, such as grafting wax, which shields the newly joined sections from environmental stressors, ensuring the healthy development of apple trees.
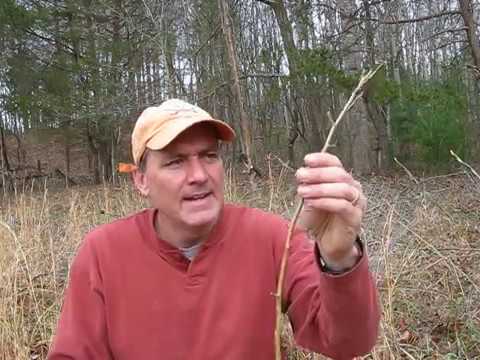
Image taken from the YouTube channel Homesteading Off The Grid , from the video titled How To Grow Apple Trees From Cuttings .
Unveiling the Magic of Apple Propagation
Apple propagation, the art and science of creating new apple trees from existing ones, holds a unique allure for the home gardener and seasoned orchardist alike. It's more than just a horticultural technique; it's a pathway to preserving cherished varieties, tailoring trees to specific growing conditions, and experiencing the profound satisfaction of nurturing life from a simple cutting or graft.
Why Propagate Apples?
The reasons to embark on apple propagation are compelling. Perhaps you have a heritage apple tree in your backyard, a variety passed down through generations, and wish to ensure its survival for years to come. Propagation allows you to create exact genetic copies, safeguarding unique flavors and characteristics that might otherwise be lost.
Or maybe you're seeking to optimize your orchard for specific soil conditions or disease pressures. By grafting your desired apple variety onto a carefully selected rootstock, you can create a tree that is both productive and resilient.
Beyond the practical benefits, there's an undeniable sense of accomplishment that comes from successfully propagating your own apple trees. It's a hands-on connection to the natural world, a testament to your skill and patience, and a rewarding way to contribute to the bounty of your landscape.
Two Paths to a New Apple Tree
There are primarily two main methods to bring an apple tree to life: grafting and rooting cuttings.
Grafting
Grafting involves joining two plant parts together, a scion (the desired apple variety) and a rootstock (the root system). This is the most common method of apple propagation.
The scion provides the above-ground characteristics of the tree, while the rootstock influences its size, disease resistance, and adaptability to different soil types.
Rooting Cuttings
Rooting cuttings, on the other hand, involves taking a piece of an existing apple tree (a stem cutting) and encouraging it to develop its own root system.
While this method can be simpler in some ways, it's not always as reliable for apples as grafting, and the resulting trees may not possess the same desirable traits as those grown on specific rootstocks.
The Foundation of Success: Healthy Plant Material
Regardless of the propagation method you choose, the quality of your starting material is paramount. A healthy scion or cutting taken from a vigorous, disease-free tree is far more likely to thrive than one taken from a weak or infected source.
Investing in certified disease-free scion wood and rootstocks from reputable nurseries will significantly increase your chances of success, ensuring a strong foundation for your future apple trees. Starting with healthy plant material is not just a recommendation, it is a must.
Understanding the Key Players: Scion and Rootstock
The journey of apple propagation begins with understanding the roles and relationships of the key players. It's a collaborative effort, guided by the gardener's hand and reliant on the unique contributions of the scion and rootstock. Before we delve into the techniques, let's explore the significance of each element in this horticultural partnership.
The Gardener's Role: Orchestrating the Growth
The gardener, or horticulturist, takes on the role of the orchestrator. They are the decision-maker, the one who envisions the desired outcome and guides the process from start to finish.
It is the gardener's responsibility to:
- Select the appropriate scion and rootstock combinations.
- Employ the correct grafting or cutting techniques.
- Provide the necessary care and attention to ensure successful propagation.
Success hinges on knowledge, patience, and a willingness to learn and adapt.
Learning from Experts: The Value of Mentorship
While the internet provides a wealth of information, there's no substitute for the wisdom gained from experienced plant propagators and reputable nurseries. Seek out local experts. Ask questions. Attend workshops.
Nurseries often hold a wealth of knowledge about regional varieties and suitable rootstocks for your area's specific climate and soil conditions.
Learning from those who have walked the path before can significantly increase your chances of success.
Scion and Rootstock: The Foundation of Your Future Tree
At the heart of apple propagation lies the crucial relationship between the scion and the rootstock. These two components, joined together through grafting, determine the characteristics and long-term health of your apple tree.
Think of it as a carefully chosen partnership where each member brings unique strengths to the table.
The Scion: Defining the Fruit
The scion is the source of the desired apple variety. It's a cutting taken from a parent tree known for its specific fruit characteristics – flavor, size, color, ripening time, and disease resistance.
- The scion dictates what kind of apples your tree will produce.
When selecting a scion, consider your taste preferences and the suitability of the variety to your local climate.
Do you prefer a tart Granny Smith or a sweet Honeycrisp? Does your region have a short growing season that requires an early-ripening variety?
These are crucial factors to consider.
The Rootstock: Anchoring and Influencing Growth
The rootstock, on the other hand, provides the root system for the new tree. It influences tree size, vigor, disease resistance, and even the precocity (how soon the tree starts bearing fruit).
Choosing the right rootstock is as important as selecting the scion.
Rootstocks are generally chosen based on several factors:
-
Desired Tree Size: Rootstocks are classified by their dwarfing effect. From dwarf to semi-dwarf to standard, the choice determines the mature size of your tree, impacting ease of care and space requirements.
-
Disease Resistance: Certain rootstocks offer resistance to common apple tree diseases, such as fire blight or collar rot. Selecting a disease-resistant rootstock can significantly improve the long-term health of your tree.
-
Soil Conditions: Some rootstocks are better adapted to specific soil types, such as heavy clay or sandy soils. Matching the rootstock to your soil conditions ensures optimal growth and nutrient uptake.
-
Climate Adaptability: Different rootstocks may exhibit varying degrees of cold hardiness or drought tolerance. Choose a rootstock that is well-suited to your region's climate.
Common Apple Rootstocks:
-
M.9: Dwarfing rootstock. Produces very small trees, ideal for small gardens and high-density plantings. Requires staking for support.
-
M.26: Semi-dwarfing rootstock. Produces smaller trees than standard rootstocks, suitable for larger gardens. May require staking in windy locations.
-
MM106: Semi-dwarfing rootstock. A widely used rootstock that produces trees of moderate size. Adapts well to various soil types.
-
MM111: Semi-standard rootstock. Produces larger trees that are more vigorous and drought-tolerant. Suitable for less fertile soils.
-
Bud.9 (Budagovsky 9): Dwarfing rootstock. Known for its cold hardiness and disease resistance. Induces early fruit production. Requires staking.
Understanding the characteristics of different rootstocks empowers you to tailor your apple tree to your specific needs and growing conditions.
By carefully considering the scion and rootstock, you lay the groundwork for a thriving, productive apple tree that will bring years of enjoyment.
Grafting Techniques: Joining Forces for Fruitful Results
Understanding the Key Players: Scion and Rootstock The journey of apple propagation begins with understanding the roles and relationships of the key players. It's a collaborative effort, guided by the gardener's hand and reliant on the unique contributions of the scion and rootstock. Before we delve into the techniques, let's explore the significance...
Grafting is an age-old horticultural art.
It involves joining two plants – the scion (the desired apple variety) and the rootstock (providing the root system) – together.
The goal?
To create a single tree that possesses the best qualities of both.
The precision and skill involved transform individual components.
It ultimately allows you to cultivate specific apple varieties with desirable traits like disease resistance or dwarfing characteristics.
Unlocking the Power of Grafting: Why It Matters
Grafting isn't just a technique; it's a gateway.
It unlocks the ability to propagate apple varieties that might not come true from seed.
It allows you to tailor your orchard.
You can create specific traits, ensuring your trees thrive in your local environment.
Think of it as a strategic partnership.
By uniting compatible scions and rootstocks, you’re essentially building a customized apple tree perfectly suited to your needs.
The Four Pillars: Essential Grafting Methods
Several grafting methods exist.
Each one offers distinct advantages depending on the size of the materials and the time of year.
Here, we'll explore four of the most popular and effective techniques.
Whip and Tongue Grafting: Precision is Key
This method offers a strong union.
It is best performed in late winter or early spring while both scion and rootstock are dormant.
Step-by-Step Instructions:
-
Prepare the Scion: Select a dormant scion with several healthy buds. Make a sloping cut, about 1-2 inches long, at the base of the scion. Then, make a tongue cut, about ½ inch long, into the cut surface, starting about ⅓ of the way down from the tip.
-
Prepare the Rootstock: Make a matching sloping cut and tongue on the rootstock, mirroring the cuts on the scion.
-
Join the Scion and Rootstock: Interlock the tongues of the scion and rootstock, ensuring that the cambium layers (the green layer just under the bark) are in close contact on at least one side.
-
Secure the Graft: Wrap the graft union tightly with grafting tape or wax to prevent drying out and to hold the scion and rootstock together.
Best Practices:
- Sharp tools are essential for clean cuts that promote good cambial contact.
- Ensure the scion and rootstock are of similar diameter for optimal joining.
- Wrap the graft union tightly to exclude air and moisture.
Cleft Grafting: Revitalizing Established Trees
Cleft grafting is ideal for grafting a smaller scion onto a larger rootstock.
It's often used to change the variety of an existing tree.
Step-by-Step Instructions:
-
Prepare the Rootstock: Saw off the rootstock branch cleanly at a desired location. Use a grafting knife to create a cleft, or split, down the center of the cut surface.
-
Prepare the Scions: Select two scions, each with 2-3 buds.
Make a wedge-shaped cut at the base of each scion.
The wedge should be slightly thicker on one side.
- Insert the Scions: Carefully insert one scion into each side of the cleft.
Ensure the cambium layers of the scions are aligned with the cambium layer of the rootstock.
The thicker side of the wedge should face outwards to create tighter contact.
- Secure the Graft: Wrap the entire graft union tightly with grafting tape or wax.
Be sure to seal the open end of the cleft to prevent moisture loss and disease.
Best Practices:
- This method is best suited for dormant rootstocks with a diameter of 1-3 inches.
- Use two scions for better chances of success.
- Seal all exposed surfaces with grafting wax to prevent desiccation.
Bud Grafting (T-Budding): A Summer Specialty
T-budding is typically performed in late summer.
This is when the bark is easily separated from the wood.
It involves inserting a single bud from the desired scion variety onto the rootstock.
Step-by-Step Instructions:
- Prepare the Rootstock: Make a T-shaped cut on the bark of the rootstock.
The vertical cut should be about 1 inch long.
The horizontal cut should be about ½ inch wide.
-
Prepare the Bud: Carefully remove a bud from the scion wood, along with a small shield of bark.
-
Insert the Bud: Gently lift the flaps of bark on the rootstock and slide the bud shield underneath.
Ensure the bud is facing upwards.
- Secure the Graft: Wrap the graft union tightly with budding tape, leaving the bud exposed.
Best Practices:
- The bark must be slipping easily for successful T-budding.
- Work quickly to prevent the bud from drying out.
- Remove the budding tape after a few weeks once the bud has taken.
Chip Budding: An Alternative Approach
Chip budding is similar to T-budding.
It offers a viable alternative when the bark isn't easily slipping.
Step-by-Step Instructions:
-
Prepare the Rootstock: Make a downward cut into the rootstock at a 45-degree angle, about ¼ inch deep. Make a second cut upwards to meet the first cut, removing a chip of bark and wood.
-
Prepare the Bud: Remove a matching chip of bark and wood from the scion wood, containing a healthy bud. The chip should be the same size and shape as the one removed from the rootstock.
-
Insert the Bud: Place the bud chip into the space on the rootstock, ensuring the cambium layers are aligned.
-
Secure the Graft: Wrap the graft union tightly with budding tape, leaving the bud exposed.
Best Practices:
- Precise cuts are crucial for ensuring good cambial contact.
- Match the bud chip size and shape to the space on the rootstock.
- Monitor the bud for signs of growth in the following spring.
The Science Behind the Success: Cambium, Union, and Callus
Grafting isn't just about physically joining two plants.
It’s about creating a biological connection that allows them to function as one.
The Cambium Layer: The Key to Connection
The cambium is a thin layer of actively dividing cells located just under the bark.
This is present in both the scion and the rootstock.
Successful grafting relies on aligning the cambium layers of the two plants.
This allows them to fuse together and form a continuous vascular system.
Graft Union: A Bridge Between Two Worlds
The graft union is the point where the scion and rootstock join.
Over time, the cells at the cambium layers differentiate and interlock, creating a strong, permanent bond.
The formation of the graft union is essential for the long-term survival and productivity of the grafted tree.
Callus Formation: Nature's Healing Touch
Callus is a protective tissue that forms over a wound.
In grafting, callus formation is vital for sealing the graft union.
This protects it from infection and desiccation.
A strong callus bridge ensures the successful integration of the scion and rootstock.
Essential Tools: Equipping Yourself for Success
Having the right tools is crucial for successful grafting.
Sharp, clean cuts are essential for promoting good cambial contact and preventing disease.
Here are some essential tools:
- Grafting Knife: A specialized knife with a straight, sharp blade for making precise cuts.
- Budding Knife: A knife with a curved blade, ideal for removing buds and creating flaps in the bark.
- Grafting Tape/Wax: Used to secure the graft union and prevent moisture loss.
Sterilizing your tools with a disinfectant before each graft is vital.
This prevents the spread of diseases between plants.
By mastering these grafting techniques and understanding the underlying principles, you'll be well on your way to creating your own thriving apple orchard.
Rooting Cuttings: A Simpler (But Less Common) Alternative
While grafting reigns supreme in apple propagation, rooting cuttings offers a more straightforward, albeit less frequently successful, route to creating new trees. It bypasses the need for a rootstock, aiming to establish roots directly from a cutting of the desired apple variety.
It's important to manage expectations: rooting apple cuttings is often more challenging than with other fruit trees. Success rates can be lower, and the resulting trees may not possess the vigor or disease resistance conferred by a well-chosen rootstock.
However, for the adventurous gardener, or when working with varieties known to root more readily, it's a viable option. Let's explore the two primary approaches: hardwood and softwood cuttings.
Understanding the Two Approaches: Hardwood vs. Softwood
Hardwood and softwood cuttings represent two different stages of the apple tree's growth cycle, each requiring a slightly different approach.
Hardwood cuttings, taken during the dormant season, are mature, woody stems. Softwood cuttings, on the other hand, are harvested from the new, green growth of spring or early summer.
Hardwood Cuttings: A Dormant Season Project
When to Take Hardwood Cuttings
The ideal time to collect hardwood cuttings is in late winter or early spring, just before the buds begin to swell. This is when the tree is dormant and the cuttings are packed with stored energy.
Step-by-Step Guide to Taking and Rooting Hardwood Cuttings
- Select Healthy Wood: Choose pencil-thick, one-year-old shoots from healthy, disease-free trees.
- Make the Cut: Use sharp, sterilized pruning shears to cut sections 6-8 inches long. Make a slanted cut at the top (to identify the correct orientation) and a horizontal cut at the base.
- Prepare the Cuttings: Remove any remaining leaves or buds from the lower portion of the cutting.
- Apply Rooting Hormone: Dip the base of each cutting into a rooting hormone powder or liquid, following the manufacturer's instructions. This is a crucial step to encourage root development.
- Planting Medium: Use a well-draining potting mix or a combination of perlite and peat moss.
- Plant the Cuttings: Insert the cuttings into the prepared medium, burying about two-thirds of their length.
- Provide Humidity: Cover the cuttings with a plastic bag or place them in a propagator to maintain high humidity.
- Location: Place the cuttings in a cool, shaded location.
- Patience is Key: Rooting can take several weeks or even months. Keep the medium moist but not waterlogged.
- Check for Rooting: Gently tug on the cuttings after a few months. Resistance indicates root development.
Best Practices for Hardwood Cutting Success
- Maintain Moisture: Consistent moisture is vital, but avoid overwatering, which can lead to rot.
- Cool Temperatures: Cool temperatures encourage root development rather than leaf growth.
- High Humidity: Enclosing the cuttings in a humid environment prevents them from drying out before roots can form.
Softwood Cuttings: A Springtime Endeavor
Timing for Softwood Cuttings
Softwood cuttings are best taken in late spring or early summer, when the new growth is still pliable and green.
Propagating Softwood Cuttings: A Detailed Approach
- Select the Right Material: Choose shoots that are flexible but not too soft. They should snap easily when bent sharply.
- Taking the Cuttings: Cut 4-6 inch sections, making sure to include several leaf nodes.
- Prepare the Cutting: Remove the lower leaves, leaving only a few at the top. This reduces moisture loss.
- Rooting Hormone: Dip the base of the cutting into rooting hormone.
- Planting Medium: Use a well-draining mix, such as perlite and vermiculite.
- Planting the Cutting: Insert the cutting into the medium, burying the bottom node.
- Humidity Dome: Cover with a humidity dome or plastic bag to maintain high humidity.
- Warmth and Light: Provide gentle warmth and bright, indirect light. Avoid direct sunlight, which can scorch the cuttings.
- Regular Misting: Mist the cuttings regularly to maintain humidity.
- Monitor for Rooting: Rooting typically occurs within a few weeks.
Key Strategies for Softwood Cutting Success
- Maintain High Humidity: This is critical for preventing the cuttings from drying out.
- Provide Warmth: Bottom heat can accelerate rooting.
- Avoid Direct Sunlight: Softwood cuttings are susceptible to sunburn.
- Choose the Right Medium: A well-draining medium is essential to prevent rot.
The Role of Rooting Hormone
Rooting hormones contain auxins, plant hormones that stimulate root development. While some apple varieties may root without it, using a rooting hormone significantly increases your chances of success.
Overcoming Challenges and Setting Realistic Expectations
Rooting apple cuttings is not always a guaranteed success. Experiment with different varieties and techniques to find what works best for you.
Remember that even with the best practices, some cuttings will fail to root. Don't be discouraged! View each attempt as a learning experience and refine your approach accordingly.
Ultimately, while rooting cuttings may be less common than grafting for apples, it's a valuable skill to acquire. With patience, attention to detail, and a bit of luck, you can propagate your own apple trees from cuttings.
Setting the Stage for Success: Preparation and Environment
Rooting Cuttings: A Simpler (But Less Common) Alternative While grafting reigns supreme in apple propagation, rooting cuttings offers a more straightforward, albeit less frequently successful, route to creating new trees. It bypasses the need for a rootstock, aiming to establish roots directly from a cutting of the desired apple variety.
It's important to realize that proper preparation and a nurturing environment are paramount to maximizing your chances of success with either grafting or rooting cuttings. This stage sets the foundation upon which your future apple tree will thrive.
Timing Scion Wood Collection
Timing is everything, especially when it comes to sourcing scion wood. The ideal window for collecting scion wood is during the dormant season, typically in late winter, before the buds begin to swell. This is when the scion wood is packed with stored energy, ready to jumpstart growth when grafted onto the rootstock.
Avoid collecting scion wood during periods of extreme cold, as this can damage the buds. Select healthy, vigorous shoots from the previous season's growth, ideally pencil-thick and free from any signs of disease or insect infestation.
Sourcing Quality Rootstocks
The rootstock you choose profoundly impacts the size, vigor, disease resistance, and ultimately, the fruitfulness of your apple tree. While it is possible to grow a tree from seed, this is not recommended as you will not be able to control the type of apple you will harvest.
Reliable nurseries are the best source for obtaining certified disease-free rootstocks. They offer a wide selection of rootstocks, each with unique characteristics. Consider factors like your climate, soil type, and desired tree size when making your selection.
Popular rootstock options include M.9 (dwarfing), M.26 (semi-dwarfing), MM106 (semi-standard), and MM111 (standard). It's crucial to research the specific characteristics of each rootstock to ensure it's compatible with your chosen scion variety and suitable for your growing conditions.
Creating the Ideal Growing Environment
Whether you're grafting or rooting cuttings, providing the right environment is essential for success. Temperature, humidity, and light all play critical roles in the propagation process.
For grafting, a controlled environment like a greenhouse or a sheltered indoor space is ideal. This allows you to maintain consistent temperature and humidity levels, promoting callus formation at the graft union.
For rooting cuttings, a humid environment is crucial to prevent the cuttings from drying out before they can develop roots. You can create a mini-greenhouse effect by covering the cuttings with a plastic bag or dome.
Greenhouses vs. Outdoor Beds
- Greenhouses offer superior control over environmental factors, allowing for year-round propagation. They provide protection from harsh weather conditions and pests.
- Outdoor beds are a more affordable option, but they are subject to the whims of nature. Choose a sheltered location with well-draining soil and provide shade during the hottest part of the day.
No matter which environment you choose, ensure it is clean and free from pests and diseases. Sanitation is key to preventing problems down the road.
Understanding Vegetative Propagation
Before we move on, it's important to briefly define vegetative propagation, as it encompasses both grafting and rooting cuttings.
Vegetative propagation is any form of asexual plant reproduction, using vegetative parts of the plant (stems, leaves, roots) to create a new individual. This means the new plant is a clone of the parent plant, preserving its desirable characteristics. This is why it is so important to collect scion wood from the healthiest trees you can find.
Nurturing Young Trees: Post-Propagation Care
Successful grafting or rooting is only the first step. The subsequent care given to your young apple trees is crucial for their survival and vigorous growth. Neglecting these vital aspects can lead to failure, undoing all your previous efforts. This section provides comprehensive guidance on nurturing your newly propagated apple trees.
Watering and Fertilizing: The Foundations of Growth
Water and nutrients are the lifeblood of any plant. Providing the right amount at the right time is key to healthy development.
Watering: Newly grafted or rooted trees need consistent moisture, especially during the first few months. The soil should be kept evenly moist, but not waterlogged. Overwatering can lead to root rot, a common killer of young plants. Check the soil moisture regularly by sticking your finger an inch or two into the soil. If it feels dry, it's time to water.
Fertilizing: Young trees benefit from regular feeding with a balanced fertilizer. A slow-release fertilizer is ideal, as it provides a steady supply of nutrients over a longer period. Apply the fertilizer according to the manufacturer's instructions. Avoid over-fertilizing, as this can burn the roots and damage the plant.
Protecting Against Pests and Diseases: A Proactive Approach
Young apple trees are particularly vulnerable to pests and diseases. Regular monitoring and preventative measures are essential.
Pest Control: Common pests that attack apple trees include aphids, mites, and caterpillars. Inspect your trees regularly for signs of infestation. If you find pests, take action promptly. Organic pest control methods, such as insecticidal soap or horticultural oil, are often effective.
Disease Prevention: Apple trees are susceptible to various fungal diseases, such as apple scab and powdery mildew. Ensure good air circulation around your trees by pruning them properly. Apply preventative fungicides if necessary, following the product label carefully.
The Importance of Proper Soil/Potting Mix
The growing medium plays a vital role in the health of your young trees. It needs to provide adequate drainage, aeration, and nutrients.
Potting Mix: For trees grown in containers, use a high-quality potting mix specifically formulated for trees. Avoid using garden soil, as it can be too heavy and poorly drained.
Soil Preparation: When planting trees in the ground, amend the soil with organic matter, such as compost or well-rotted manure. This will improve drainage, aeration, and fertility.
Labeling: Avoiding Future Confusion
Always label your trees clearly with the variety of apple and the date of propagation. This will help you keep track of your trees and avoid confusion later on. Use weather-resistant labels and a permanent marker.
Pruning Young Trees: Shaping for Success
Pruning is an essential part of training young apple trees. It helps to establish a strong framework and promote fruit production.
Initial Pruning: After grafting or rooting, prune back any weak or damaged branches. This will encourage the tree to focus its energy on developing strong, healthy growth.
Shaping Pruning: In subsequent years, prune your trees to create an open, well-ventilated canopy. This will improve sunlight penetration and reduce the risk of disease. Use sharp, clean pruning shears or loppers to make clean cuts. Remove any crossing or rubbing branches.
By following these guidelines, you can provide your young apple trees with the best possible start in life, ensuring a future filled with delicious, homegrown fruit. Remember, consistent care and attention are key to success.
Planting and Long-Term Care: From Propagation to Orchard
Nurturing Young Trees: Post-Propagation Care Successful grafting or rooting is only the first step. The subsequent care given to your young apple trees is crucial for their survival and vigorous growth. Neglecting these vital aspects can lead to failure, undoing all your previous efforts. This section provides comprehensive guidance on nurturing your trees from planting to maturity.
Preparing the Planting Site: Location, Location, Location
Choosing the right location is paramount. Apple trees need at least 6-8 hours of direct sunlight each day to thrive.
Sufficient sunlight ensures optimal fruit production and overall tree health.
Avoid planting in low-lying areas where water tends to accumulate.
Poorly drained soil can lead to root rot and other fungal diseases.
The soil should be well-draining and rich in organic matter. Conduct a soil test to determine the pH level.
Ideally, it should be between 6.0 and 7.0. Amend the soil with compost or other organic materials to improve its fertility and drainage.
Clear the planting site of any weeds, grass, or other debris. Dig a hole that is twice as wide as the root ball and just as deep.
This allows the roots to spread easily and establish themselves quickly.
Planting Your Propagated Apple Tree: A Step-by-Step Guide
Gently remove the apple tree from its container. Tease apart any circling roots, which can girdle the tree if left unattended.
Place the tree in the hole, ensuring that the top of the root ball is level with the surrounding soil.
Backfill the hole with the amended soil, tamping it down gently to remove air pockets.
Water the newly planted tree thoroughly to settle the soil.
Apply a layer of mulch around the base of the tree to help retain moisture and suppress weeds. Keep the mulch a few inches away from the trunk to prevent rot.
Stake the tree if necessary, especially in windy areas. The stake should be placed a few inches away from the trunk and secured with soft ties.
Long-Term Care: Ensuring a Lifetime of Delicious Apples
Watering and Fertilizing
Water deeply and regularly, especially during dry periods. Young trees need consistent moisture to establish their root systems.
Fertilize in the spring with a balanced fertilizer, following the manufacturer's instructions. Avoid over-fertilizing, which can damage the tree.
Pruning for Structure and Fruit Production
Pruning is essential for maintaining the shape and health of your apple tree. Prune in late winter or early spring, before new growth begins.
Remove any dead, diseased, or crossing branches. Thin out the canopy to allow for better air circulation and sunlight penetration.
Proper pruning promotes fruit production and reduces the risk of disease.
Pest and Disease Management
Regularly inspect your apple tree for signs of pests or diseases. Common pests include aphids, codling moths, and apple scab.
Treat any infestations or infections promptly with appropriate organic or chemical controls.
Preventative measures, such as good air circulation and proper sanitation, can help minimize pest and disease problems.
Protecting from Wildlife
Protect young trees from wildlife, such as deer and rabbits, which can damage or kill them.
Use tree guards or fencing to create a physical barrier.
Harvesting and Storage
Harvest apples when they are fully ripe, indicated by their color, aroma, and ease of detachment from the tree. Handle the fruit carefully to avoid bruising.
Store apples in a cool, dark, and humid place. Proper storage can extend their shelf life and ensure a steady supply of fresh fruit.
The Importance of Appropriate Containers/Pots (If Applicable)
If you're growing your apple tree in a container, choose one that is large enough to accommodate the root system.
Ensure the container has drainage holes to prevent waterlogging. Use a high-quality potting mix that is well-draining and rich in nutrients.
Repot the tree every few years as it grows larger. Container-grown apple trees require more frequent watering and fertilizing than those planted in the ground.
Video: Apple Propagation: Grow Your Own Orchard!

FAQ: Apple Propagation: Grow Your Own Orchard!
What are the main methods of apple propagation?
The primary methods include grafting, budding, and growing from seed. Grafting and budding are preferred for preserving specific apple varieties. Seed propagation rarely produces trees identical to the parent.
Why is grafting so important for apple trees?
Grafting combines the desired fruit variety (scion) with a rootstock that controls size and disease resistance. This ensures consistent fruit quality and predictable tree characteristics, vital aspects of apple propagation.
What kind of rootstock should I choose for my apple tree?
Rootstock selection depends on your desired tree size, soil type, and disease resistance needs. Consult with local nurseries or extension offices for recommendations suitable for your region and desired apple propagation outcomes.
How long does it take to get apples from a propagated tree?
Grafted or budded apple trees typically begin producing fruit within 2-5 years. Trees grown from seed can take much longer, often 5-10 years, and may not yield the same quality fruit as the parent tree which highlights why controlled apple propagation methods are preferred.
So, there you have it! Apple propagation might seem a little daunting at first, but with a bit of patience and a green thumb, you could be enjoying homegrown apples from your very own trees before you know it. Get out there and give it a shot – happy growing!
